

Java课程说明
1. 开发工具:IDEA IntellJ + MySQL
2. 开发环境:SpringBoot+JPA+Maven项目管理
3. 开发内容:完成对单张数据表的增删改查操作。
步骤
1、在IDEA平台上构建基于maven的SpringBoot项目
使用J2EE (SpringBoot+JPA) 来实现单表的增刪改查操作。
1、使用Idea构建基于maven的SpringBoot开发环境
a.创建一个maven的项目
groupid为edu.hue.jk.spring
artifactId为springboot
注: idea 创建springboot项目的方法有很多种。这里使用纯手工方式构建
2、设置maven配置文件pom. xml
指定第三方软件包安装资料库服务器,系统将自动从该服务器上下载软件包。这里我们aliyun服务器,国内较快的。
复制收展XML<repositories>
        <!-- 通过阿里云maven资料库下载软件包 -->
        <repository>
            <id>aliyun-repos</id>
            <url>http://maven.aliyun.com/nexus/content/groups/public/</url>
            <snapshots>
                <enabled>false</enabled>
            </snapshots>
        </repository>
</repositories>- 1
- 2
- 3
- 4
- 5
- 6
- 7
- 8
- 9
- 10
指定项目编码集和jdk的版本
复制收展XML<properties>
        <project.build.sourceEncoding>UTF-8</project.build.sourceEncoding>
        <project.reporting.outputEncoding>UTF-8</project.reporting.outputEncoding>
        <java.version>1.8</java.version>
</properties>- 1
- 2
- 3
- 4
- 5
3、指定springboot所需的软件包
springboot依赖于spring,所以他是spring的子项目,引入依赖
复制收展XML<!-- 所有的SpringBoot项目需要继承此父项目 -->
    <parent>
        <groupId>org.springframework.boot</groupId>
        <artifactId>spring-boot-starter-parent</artifactId>
        <version>2.0.3.RELEASE</version>
        <relativePath/>
</parent>- 1
- 2
- 3
- 4
- 5
- 6
- 7
上面配置Spring Boot的父级依赖,这样当前的项目就是Spring Boot项目了。
spring-boot-starter-parent 是一个特殊的starter,它用来提供相关的Maven默认依赖。使用它之后,常用的包依赖可以省去version标签。
我们需要tomcat容器,引入web依赖
复制收展XML<!-- 集成了tomcat -->
        <dependency>
            <groupId>org.springframework.boot</groupId>
            <artifactId>spring-boot-starter-web</artifactId>
</dependency>- 1
- 2
- 3
- 4
- 5
4、创建一个引导类
复制收展Javapackage edu.hue.jk;

import org.springframework.boot.SpringApplication;
import org.springframework.boot.autoconfigure.SpringBootApplication;

/**
 * @Desc -累行客
 * @Author luolei
 * @Web http://www.leixing.xyz/
 * @Date 2020/06/07 17:43
 */
@SpringBootApplication  /*注解是 Sprnig Boot项目的核心注解,目的是开启自动配置*/
public class MainApp {
    public static void main(String[] args) {
        /**
         * SpringApplication.run一共做了两件事
         * 1、建SpringApplication对象;在对象初始化时保存事件监听器,容器初始化类以及判断是否为web应用,保存包含main方法的主配置类。
         * 2、调用run方法;准备spring的上下文,完成容器的初始化,创建,加载等。会在不同的时机触发监听器的不同事件。
        */
        SpringApplication.run(MainApp.class).start();
    }
}- 1
- 2
- 3
- 4
- 5
- 6
- 7
- 8
- 9
- 10
- 11
- 12
- 13
- 14
- 15
- 16
- 17
- 18
- 19
- 20
- 21
- 22
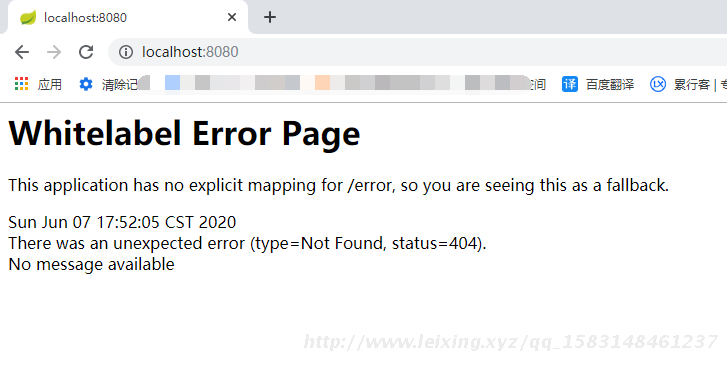
启动
2、 使用SpringBoot简化处理用户请求的过程
SpringBoot的使用简化了数据传递,页面跳转,配置,等操作。
之前在JSP中使用 request.getParameter()方式获取参数
现在Spring对各种类型自动转换,
直接将传递过来的参数,包装成一个JavaBean
之前在JSP中使用 request.getParameter()方式获取参数 然后进行类型转换然后javaBean的setXXX进行设置,现在自动完成。
复制收展Javapackage edu.hue.jk;
import org.springframework.stereotype.Controller;
import org.springframework.web.bind.annotation.RequestMapping;
import org.springframework.web.bind.annotation.ResponseBody;
import java.sql.Date;
/**
* @Desc -累行客
* @Author luolei
* @Web http://www.leixing.xyz/
* @Date 2020/06/07 17:56
*/
@Controller
public class StudentAction {
@RequestMapping("/hi")
@ResponseBody
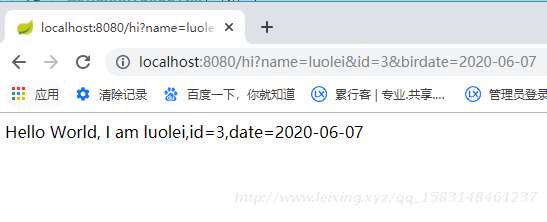
public String hi(String name, Integer id, Date birdate ) {
return "Hello World, I am " + name + ",id="+id + ",birdate ="+birdate;
}
}- 1
- 2
- 3
- 4
- 5
- 6
- 7
- 8
- 9
- 10
- 11
- 12
- 13
- 14
- 15
- 16
- 17
- 18
- 19
- 20
- 21
- 22
- 23
- 24
现在创建一个Student类,包含上述所有参数,会自动封装到Student中
复制收展Javapackage edu.hue.jk;

import java.sql.Date;

/**
 * @Desc -累行客
 * @Author luolei
 * @Web http://www.leixing.xyz/
 * @Date 2020/06/07 18:08
 */
public class Student {

    private Integer id;
    private String name;
    private Date birdate;

    public Integer getId() {
        return id;
    }

    public void setId(Integer id) {
        this.id = id;
    }

    public String getName() {
        return name;
    }

    public void setName(String name) {
        this.name = name;
    }

    public Date getBirdate() {
        return birdate;
    }

    public void setBirdate(Date birdate) {
        this.birdate = birdate;
    }

    @Override
    public int hashCode() {
        return super.hashCode();
    }

    @Override
    public boolean equals(Object obj) {
        return super.equals(obj);
    }

    @Override
    public String toString() {
        return "Student{" +
                "id=" + id +
                ", name='" + name + '\'' +
                ", birdate=" + birdate +
                '}';
    }
}- 1
- 2
- 3
- 4
- 5
- 6
- 7
- 8
- 9
- 10
- 11
- 12
- 13
- 14
- 15
- 16
- 17
- 18
- 19
- 20
- 21
- 22
- 23
- 24
- 25
- 26
- 27
- 28
- 29
- 30
- 31
- 32
- 33
- 34
- 35
- 36
- 37
- 38
- 39
- 40
- 41
- 42
- 43
- 44
- 45
- 46
- 47
- 48
- 49
- 50
- 51
- 52
- 53
- 54
- 55
- 56
- 57
- 58
- 59
StudentAction
复制收展Javapackage edu.hue.jk;

import org.springframework.stereotype.Controller;
import org.springframework.web.bind.annotation.RequestMapping;
import org.springframework.web.bind.annotation.ResponseBody;

import java.sql.Date;


/**
 * @Desc -累行客
 * @Author luolei
 * @Web http://www.leixing.xyz/
 * @Date 2020/06/07 17:56
 */
@Controller
public class StudentAction {

    @RequestMapping("/hi")
    @ResponseBody
    public String hi(Student stu) {
        return "Hello World, I am " + stu.getName() + ",id="+stu.getId() + ",date="+stu.getBirdate();
    }
}- 1
- 2
- 3
- 4
- 5
- 6
- 7
- 8
- 9
- 10
- 11
- 12
- 13
- 14
- 15
- 16
- 17
- 18
- 19
- 20
- 21
- 22
- 23
- 24
结果是一样的。Spring自动的将请求参数封装成javabean
3、使用SpringBoot简化用户响应操作
首先引入JSP替代方案thymeleaf。thymeleaf提供了更简洁的动态页面创建方式,使写出来的页面“更像”一个静态页面。可以实现前后端开发的分离。
在pom. xml中增加thymeleaf软件包
thymeleaf使用可参考
http://www.leixing.xyz/article/detail/p2EJJW7j
复制收展XML<!--thymeleaf模版-->
        <dependency>
            <groupId>org.springframework.boot</groupId>
            <artifactId>spring-boot-starter-thymeleaf</artifactId>
</dependency>- 1
- 2
- 3
- 4
- 5
在resources目录下创建templates目标,在templates下创建hello.html
实现页面跳转
以前,JSP使用RequestDispatcher.forward方式实现跳转,
现在自动跳转到对应的html,这都是Spring帮我们做的。
页面间的数据传递
以前,JSP 使用request.setAttribute放置数据 ,在JSP中request.getAttribute取数据,之前也可以JSTL和这个Themleaf差不多,不过只能在JSP文件中使用。
现在使用Themleaf 读取数据,
引入命名空间:<html lang="en" xmlns:th="http://www.thymeleaf.org">
复制收展HTML<!DOCTYPE html>
<html lang="en" xmlns:th="http://www.thymeleaf.org">
<head>
<meta charset="UTF-8">
<title>Title</title>
</head>
<body>
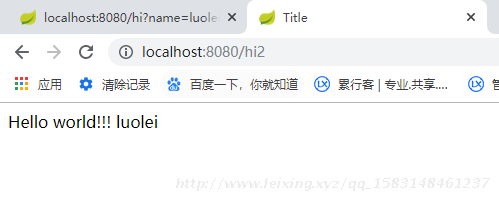
Hello world!!!
<span th:text="${name}"></span>
</body>
</html>- 1
- 2
- 3
- 4
- 5
- 6
- 7
- 8
- 9
- 10
- 11
- 12
- 13
- 14
在StudentAction中添加
复制收展Java@RequestMapping("/hi2")
    public String hi2(Model model) {
        model.addAttribute("name", "luolei");
        return "hello";
}- 1
- 2
- 3
- 4
- 5
访问
4、将JPA集成到SpringBoot中
JPA可以更方便的实现对数据表的增删改查操作。
在pom. xml中导入MySQL、JDBC、JUnit和JPA 相关包
复制收展XML<!--Spring JPA-->
<dependency>
<groupId>org.springframework.boot</groupId>
<artifactId>spring-boot-starter-data-jpa</artifactId>
</dependency>

<!--MySQL JDBC驱动-->
<dependency>
<groupId>mysql</groupId>
<artifactId>mysql-connector-java</artifactId>
</dependency>

<!--Spring JUnit单元测试-->
<dependency>
<groupId>org.springframework.boot</groupId>
<artifactId>spring-boot-starter-test</artifactId>
</dependency>- 1
- 2
- 3
- 4
- 5
- 6
- 7
- 8
- 9
- 10
- 11
- 12
- 13
- 14
- 15
- 16
- 17
配置application. yml, Spring启动时会自动加载它。在resources目录下创建application.yml
注意yml有严格的对齐
复制收展Javaspring:
  datasource:
   driver-class-name: com.mysql.jdbc.Driver
   url: jdbc:mysql://localhost:3306/test?useUnicode=true&characterEncoding=utf8&useSSL=false
   username: root
   password: 123456
 jpa:
   database-platform: org.hibernate.dialect.MySQL5InnoDBDialect
   database: MYSQL
   show-sql: true
   hibernate:
ddl-auto: validate- 1
- 2
- 3
- 4
- 5
- 6
- 7
- 8
- 9
- 10
- 11
- 12
创建表SQL
复制收展SQL# 学生表
CREATE TABLE student(
id INT PRIMARY KEY NOT NULL COMMENT 'id',
name VARCHAR(10) NOT NULL COMMENT '姓名',
bir_date DATE  NOT NULL COMMENT '生日',
score DECIMAL NOT NULL COMMENT '成绩'
)COMMENT '学生表';- 1
- 2
- 3
- 4
- 5
- 6
- 7
StudentDao
复制收展Javapackage edu.hue.jk.dao;

import edu.hue.jk.model.Student;
import org.springframework.stereotype.Repository;

import java.util.Collection;

/**
 * @Desc -累行客
 * @Author luolei
 * @Web http://www.leixing.xyz/
 * @Date 2020/06/07 19:21
 */
@Repository
/*
下面的方法命名有严格的控制,可查阅API
只需要申明函数,实际操作都已经封装好了
*/
public interface StudentDao extends org.springframework.data.repository.Repository<Student, Integer> {

    Collection<Student> findAll();

    void deleteById(Integer id);

    Student findById(Integer id);

    void save(Student s);
}- 1
- 2
- 3
- 4
- 5
- 6
- 7
- 8
- 9
- 10
- 11
- 12
- 13
- 14
- 15
- 16
- 17
- 18
- 19
- 20
- 21
- 22
- 23
- 24
- 25
- 26
- 27
- 28
在test目录下进行测试
复制收展Javapackage edu.hue.jk.dao;

import edu.hue.jk.MainApp;
import edu.hue.jk.model.Student;
import org.junit.Test;
import org.junit.runner.RunWith;
import org.springframework.beans.factory.annotation.Autowired;
import org.springframework.boot.test.context.SpringBootTest;
import org.springframework.test.context.junit4.SpringRunner;

import java.math.BigDecimal;
import java.sql.Date;
import java.util.Collection;

/**
 * @Desc -累行客
 * @Author luolei
 * @Web http://www.leixing.xyz/
 * @Date 2020/06/07 19:48
 */
@RunWith(SpringRunner.class)
@SpringBootTest(classes = MainApp.class)
public class StudentDaoTest {

    @Autowired
    StudentDao studentDao;

    @Test
    public void test(){  /*@Test 的不是public的方法报错*/
        Student stu = new Student();
        stu.setId(100001);
        stu.setName("luolei");
        stu.setBirDate(Date.valueOf("2020-06-07"));
        stu.setScore(new BigDecimal(99));
        studentDao.save(stu);

        stu.setId(100002);
        stu.setName("lei");
        stu.setBirDate(Date.valueOf("2020-06-09"));
        stu.setScore(new BigDecimal(91));
        studentDao.save(stu);


        stu.setId(100003);
        stu.setName("xing");
        stu.setBirDate(Date.valueOf("2020-06-06"));
        stu.setScore(new BigDecimal(95));
        studentDao.save(stu);

        stu.setName("new xing");
        studentDao.save(stu);

        Student stu2 = studentDao.findById(100003);
        System.out.println(stu2);

        Collection<Student> all = studentDao.findAll();
        System.out.println("总记录:"+all.size());

        studentDao.deleteById(100002);
    }
}- 1
- 2
- 3
- 4
- 5
- 6
- 7
- 8
- 9
- 10
- 11
- 12
- 13
- 14
- 15
- 16
- 17
- 18
- 19
- 20
- 21
- 22
- 23
- 24
- 25
- 26
- 27
- 28
- 29
- 30
- 31
- 32
- 33
- 34
- 35
- 36
- 37
- 38
- 39
- 40
- 41
- 42
- 43
- 44
- 45
- 46
- 47
- 48
- 49
- 50
- 51
- 52
- 53
- 54
- 55
- 56
- 57
- 58
- 59
- 60
- 61
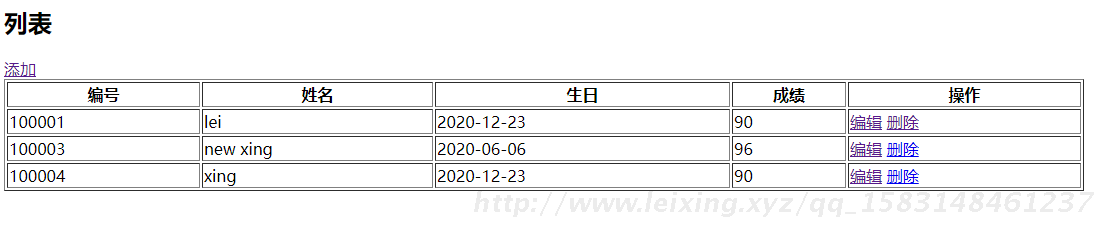
5、基于JPA和SpringBoot实现增删改查操作
在templates下创建html
list.html
复制收展HTML<!DOCTYPE html>
<html lang="en" xmlns:th="http://www.thymeleaf.org">
<head>
    <meta charset="UTF-8">
    <title>list</title>
</head>
<body>

<h2>列表</h2>
<a th:href="add">添加</a>
<table width="80%" border="1px">
    <tr>
        <th>编号</th>
        <th>姓名</th>
        <th>生日</th>
        <th>成绩</th>
        <th>操作</th>
    </tr>
    <tr th:each="stu : ${list}">
        <td th:text="${stu.id}"></td>
        <td th:text="${stu.name}"></td>
        <td th:text="${stu.birDate}"></td>
        <td th:text="${stu.score}"></td>
        <td>
            <a th:href="'edit?id=' + ${stu.id}">编辑</a>
            <a th:href="'del?id=' + ${stu.id}">删除</a>
        </td>
    </tr>
</table>

</body>
</html>- 1
- 2
- 3
- 4
- 5
- 6
- 7
- 8
- 9
- 10
- 11
- 12
- 13
- 14
- 15
- 16
- 17
- 18
- 19
- 20
- 21
- 22
- 23
- 24
- 25
- 26
- 27
- 28
- 29
- 30
- 31
- 32
add.html
复制收展HTML<!DOCTYPE html>
<html lang="en" xmlns:th="http://www.thymeleaf.org">
<head>
    <meta charset="UTF-8">
    <title>add</title>
</head>
<body>

<h2>添加</h2>
<form action="save">
    学号:<input type="text" name="id"/> <br/>
    姓名:<input type="text" name="name"/> <br/>
    生日:<input type="text" name="birDate"/> <br/>
    成绩:<input type="text" name="score"/> <br/>
    <input type="submit" text="添加">
    <input type="reset" text="清空">
</form>

</body>
</html>- 1
- 2
- 3
- 4
- 5
- 6
- 7
- 8
- 9
- 10
- 11
- 12
- 13
- 14
- 15
- 16
- 17
- 18
- 19
- 20
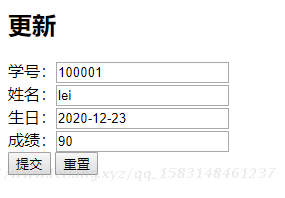
edit.html
复制收展HTML<!DOCTYPE html>
<html lang="en" xmlns:th="http://www.thymeleaf.org">
<head>
    <meta charset="UTF-8">
    <title>edit</title>
</head>
<body>

<h2>更新</h2>
<form action="save">
    学号:<input type="text" th:name="id" th:value="${stu.id}" readonly="readonly"> <br/>
    姓名:<input type="text" th:name="name" th:value="${stu.name}"> <br/>
    生日:<input type="text" th:name="birDate" th:value="${stu.birDate}"> <br/>
    成绩:<input type="text" th:name="score" th:value="${stu.score}"> <br/>
    <input type="submit" text="更新">
    <input type="reset" text="清空">
</form>

</body>
</html>- 1
- 2
- 3
- 4
- 5
- 6
- 7
- 8
- 9
- 10
- 11
- 12
- 13
- 14
- 15
- 16
- 17
- 18
- 19
- 20
复制收展Javapackage edu.hue.jk.action;

import edu.hue.jk.dao.StudentDao;
import edu.hue.jk.model.Student;
import org.springframework.beans.factory.annotation.Autowired;
import org.springframework.stereotype.Controller;
import org.springframework.ui.Model;
import org.springframework.web.bind.annotation.RequestMapping;
import org.springframework.web.bind.annotation.ResponseBody;


/**
 * @Desc -累行客
 * @Author luolei
 * @Web http://www.leixing.xyz/
 * @Date 2020/06/07 17:56
 */
@Controller
public class StudentAction {

    @Autowired
    StudentDao studentDao;

    @RequestMapping("/list")
    public String list(Model model) {
        model.addAttribute("list", studentDao.findAll());
        return "list";
    }

    @RequestMapping("/del")
    public String del(Model model, Integer id) {
        studentDao.deleteById(id);
        model.addAttribute("list", studentDao.findAll());
        return "list";
    }

    @RequestMapping("/add")
    public String add() {
        return "add";
    }
    @RequestMapping("/save")
    public String save(Model model,Student stu) {
        studentDao.save(stu);
        model.addAttribute("list", studentDao.findAll());
        return "list";
    }

    @RequestMapping("/edit")
    public String edit(Model model, Integer id) {
        Student stu = studentDao.findById(id);
        model.addAttribute("stu", stu);
        return "edit";
    }

}- 1
- 2
- 3
- 4
- 5
- 6
- 7
- 8
- 9
- 10
- 11
- 12
- 13
- 14
- 15
- 16
- 17
- 18
- 19
- 20
- 21
- 22
- 23
- 24
- 25
- 26
- 27
- 28
- 29
- 30
- 31
- 32
- 33
- 34
- 35
- 36
- 37
- 38
- 39
- 40
- 41
- 42
- 43
- 44
- 45
- 46
- 47
- 48
- 49
- 50
- 51
- 52
- 53
- 54
- 55
6、使用lombok简化开发
Student中有一大堆get/set函数,toString, hashCode等函数。虽然可自动生成,但仍然很麻烦。这里我们使用lombok技术简化这一过程
首先导入lombok软件包,
然后修改Student增加@Data注解,删除getXXX和setXXX 所有方法,上一步的只留类的成员变量,。
lombok会生成getXXX和setXXX等方法,和之前效果一样毫不影响。
复制收展XML<!-- projectlombok -->
        <dependency>
            <groupId>org.projectlombok</groupId>
            <artifactId>lombok</artifactId>
            <optional>true</optional>
</dependency>- 1
- 2
- 3
- 4
- 5
- 6
Student
复制收展Javapackage edu.hue.jk.model;

import lombok.Data;

import javax.persistence.Column;
import javax.persistence.Entity;
import javax.persistence.Id;
import javax.persistence.Table;
import java.math.BigDecimal;
import java.sql.Date;

/**
 * @Desc -累行客
 * @Author luolei
 * @Web http://www.leixing.xyz/
 * @Date 2020/06/07 18:08
 */
@Data  /*lombox*/
@Entity
@Table(name="student")
/*@Entity 标记当前类为实体类,@Table标记类与student表对应*/
public class Student {
    @Id
    private Integer id;

    @Column
    private String name;

    @Column(name = "bir_date")
    private Date birDate;

    @Column
    private BigDecimal score;

}- 1
- 2
- 3
- 4
- 5
- 6
- 7
- 8
- 9
- 10
- 11
- 12
- 13
- 14
- 15
- 16
- 17
- 18
- 19
- 20
- 21
- 22
- 23
- 24
- 25
- 26
- 27
- 28
- 29
- 30
- 31
- 32
- 33
- 34
- 35